Data Extension Search Engine
When was the last time that you’ve spent a moment appreciating the convenience and elegance of the search–address bar combo that we are used to in the modern browsers? And when was the last time that you got frustrated that there is no proper search for Marketing Cloud’s Data Extensions?
In both Email Studio and Contact Builder the Data Extension search is querying only the current folder and doesn't include results from the subfolders. It's neither convenient nor elegant. Of course there are some tools or Chrome extensions that let you search through Data Extensions, but it might be the case that either the project or even the company's policy does not allow 3rd party applications or extensions.
In this article we build a custom Data Extension Search Engine that allows you to google–search your Data Extensions and quickly access them directly from the address bar.
We will also cover some basic security and explore ideas for adding new features.
Discovery
Let’s start with gathering the foundation of the solution. In other words, what exactly enables it to work?
Data Extension URL
When you go to the Contact Builder and open Data Extension in a new tab (by middle– or Ctrl–clicking its name), you can see that the the URL follows the same pattern – there’s a stack number that your Marketing Cloud account resides on, a domain with a route and 36 characters GUID. The only thing that changes when opening different Data Extensions are those 36 chars.
Sample URL
https://s50.marketingcloudapps.com/contactsmeta/admin.html#admin/data-extension/31b291cb-689d-44ca-ae93-6d479901f52c/properties
As you may already have noticed, by simply replacing the GUID in the URL we can access Data Extensions from the address bar. To put it in other words, if we knew the GUID of the Data Extension, we would be able to open it by entering the address with the proper GUID.
Browser's Search Bar
Now for the search bar part. Modern web browsers allow you to add custom search engines that are basically an URL with the replacement string very similar to the Marketing Cloud’s Personalization Strings.
Imagine that your search engine was located at
http://example.com/search?q=query
and it was expecting the search parameter to be passed in the q query string. What a custom search engine browser would do is providing you with a syntax of
http://example.com/search?q=%s
where %s would be replaced with the term that was entered in the address bar.
To better visualise it, google something now and check how the phrase is passed in the URL's q parameter as well.
Design
We know what's possible so let's make a blueprint of the pieces that will come together.
Data Extension Details
So we need to get the GUID of the Data Extension. This is where some rudimentary SSJS comes in handy. With the DataExtension.Retrieve() function we can return an array of Data Extension objects based on the specified criteria – the search filter.
var results = DataExtension.Retrieve({
    Property:'Name',
    SimpleOperator:'like',
    Value:'Foobar'
});
Below you can find a sample response from the call.
[
    {
        "Name":"Foobar Data Extension",
        "Description":"",
        "IsSendable":true,
        "IsTestable":false,
        "CategoryID":369316,
        "IsPlatformObject":false,
        "CustomerKey":"151BB8B5-33AB-4017-AECF-5AE1C200CF8F",
        "CreatedDate":"2022-03-22T13:05:22.113",
        "ModifiedDate":"2022-03-22T13:05:22.113",
        "ObjectID":"31b191cb-689d-44ca-ae93-6d479901f52c",
        "Client":{
            "ID":726071990
        },
        "Status":"None",
        "PartnerKey":"",
        "SendableDataExtensionField":{
            "Name":"EmailAddress"
        },
        "SendableSubscriberField":{
            "Name":"_SubscriberKey"
        }
    }
]
The GUID we are looking for is the – you guessed it – ObjectID property. Other than that, the Name might come in handy as well.
Setup Considerations
We know how to fetch the Data Extension details that we need. For the results returned we need to accomodate for the 3 possible scenarios:
- No results – we display the message that nothing was found.
- One result – jackpot! We get the URL and redirect to the Data Extension.
- Multiple results – we should output search results as links.
Options number 1. and 2. are pretty straightforward, but number 3. is where it gets tricky. As you may know, JSON Code Resource doesn't use Super Message so while we can get 1. and 2. virtually for free, we won't be able to display HTML with clickable links without a standard Landing Page that consumes Super Messages.
Depending what you value more – your time or Super Messages – you can either:
- Build one endpoint on a Landing Page that consumes Super Messages. It would both redirect or display clickable links.
- Be cost conscious and time saving at once – build one JSON Code Resource that would redirect or present plain, non–clickable links. You would need to highlight one of them, right click and use the Go to option.
- Pay time to save Super Messages by building one JSON Code Resource and one Landing Page. JSON Code Resource would redirect to either a Data Extension or to Landing Page that would render clickable links.
In this article we will cover solution number 1. for the simplicity of the presentation but in the Alternative Approaches section there's a brief description on how to implement the other ones. There's a link to the GitHub repo with all of them as well.
Basic Security
Last but not least – the security. Our Cloud Page technically would be a publicly accessible URL so anyone on the internet who knows the address would be able to use it and see the results. Of course you need to actually be logged in to access the Data Extension returned, but to be honest you probably don’t want random people searching back and forth through your stuff.
We need to implement some security and to follow the best practice you would need to go for the Marketing Cloud App Installed Package with an authorisation loop so only logged in users would be able to use it. But given the fact that this is just the Data Extension names that can be exposed, we can use a custom security token stored in a cookie within the user’s browser. If the cookie with the proper value is not sent with the request, then an empty page is displayed – filtering unwelcomed traffic.
Build
At last the build phase where we put all of the pieces together. Go to the Cloud Pages, create the Landing Page and let's get down to coding.
Query Parameter
First of all we need to capture the query parameter from the URL with Platform.Request.GetQueryStringParameter(). We could just use it, but as many of you are utilising various naming conventions across your Marketing Cloud assets, we can transform it to make the search more versatile.
By the power of programmers' best friend – regular expression – let's replace whitespaces with % that is interpreted as wildcard character. To do this, we provide a short expression with the global flag (meaning it covers all found occurrences) to the replace() function. And to avoid errors when the q parameter is not present, an empty string can be added as a fallback.
note
You can switch between the code of the currently discussed Section and Full code by using the tabs below.
- Section
- Full code
var q = Platform.Request.GetQueryStringParameter('q') || '';
var query = q.replace(/\s/g, '%');
<script runat="server">
Platform.Load('Core', '1');

var q = Platform.Request.GetQueryStringParameter('q') || '';
var query = q.replace(/\s/g, '%');

</script>
With this simple change, you would be able to type your search in a more common form:
Subscribers Master
and still capture the results like:
SubscribersMaster
Subscribers_Master
Subscribers-Master
Handy, isn't it?
Retrieve Search
With the search term ready we can move to DataExtension.Retrieve(). To boost the search we can look for Data Extensions not only by Name, but by the Customer Key as well by using Complex Filter with two operands. For the Name the operator we use is like meaning that % will be added at the beginning and end of the phrase – effectively making it equivalent to SQL's LIKE '%query%'. On the other hand for the CustomerKey we are looking for the exact match with equals.
- Section
- Full code
var q = Platform.Request.GetQueryStringParameter('q') || '';
var query = q.replace(/\s/g, '%');

var results = DataExtension.Retrieve({
    LeftOperand: {
        Property: 'Name',
        SimpleOperator: 'like',
        Value: query
    },
    LogicalOperator: 'OR',
    RightOperand: {
        Property: 'CustomerKey',
        SimpleOperator: 'equals',
        Value: query
    }
});
<script runat="server">
Platform.Load('Core', '1');

var q = Platform.Request.GetQueryStringParameter('q') || '';
var query = q.replace(/\s/g, '%');

var results = DataExtension.Retrieve({
    LeftOperand: {
        Property: 'Name',
        SimpleOperator: 'like',
        Value: query
    },
    LogicalOperator: 'OR',
    RightOperand: {
        Property: 'CustomerKey',
        SimpleOperator: 'equals',
        Value: query
    }
});

</script>
Handling Results
We need to build the logic based on the number of results returned. But first let’s prepare the URL that can be appended with ObjectId or put together with a Name for the link display.
The simple function will build and return either a plain URL or full <a></a> tag with a name, based on the passed type parameter (url or a). On the top of the script we can add a variable with the stack number, so it can be easily configured in the settings.
- Section
- Full code
/* SETTINGS */
var stack = 50;

function getDataExtensionUrl(result, type) {
    var objectId = result.ObjectID;
    var url = 'https://mc.s' + stack + '.marketingcloudapps.com/' +
        'contactsmeta/admin.html#admin/data-extension/' + objectId;
    if (type == 'url') return url;
    var name = result.Name;
    return '<p><a href="' + url + '">' + name + '</a></p>';
}
<script runat="server">
Platform.Load('Core', '1');

/* --- SETTINGS --- */
var stack = 50;

var q = Platform.Request.GetQueryStringParameter('q') || '';
var query = q.replace(/\s/g, '%');

var results = DataExtension.Retrieve({
    LeftOperand: {
        Property: 'Name',
        SimpleOperator: 'like',
        Value: query
    },
    LogicalOperator: 'OR',
    RightOperand: {
        Property: 'CustomerKey',
        SimpleOperator: 'equals',
        Value: query
    }
});

function getDataExtensionUrl(result, type) {
    var objectId = result.ObjectID;
    var url = 'https://mc.s' + stack + '.marketingcloudapps.com/' +
        'contactsmeta/admin.html#admin/data-extension/' + objectId;
    if (type == 'url') return url;
    var name = result.Name;
    return '<p><a href="' + url + '">' + name + '</a></p>';
}

</script>
Now for the logic. To cover our scenarios we need an if statement and use Platform.Response.Redirect() to immediately redirect to the Data Extension URL or for loop to build an output of anchor tags in case there are multiple results.
- Section
- Full code
var output = '';
var url = '';

if (!results.length) {
    output = 'No results found for: ' + q;
} else if (results.length == 1) {
    url = getDataExtensionUrl(results[0], 'url');
    Platform.Response.Redirect(url);
} else {
    for (var i in results) {
        output += getDataExtensionUrl(results[i], 'a');
    }
}
<script runat="server">
Platform.Load('Core', '1');

/* --- SETTINGS --- */
var stack = 50;

var output = '';
var url = '';

var q = Platform.Request.GetQueryStringParameter('q') || '';
var query = q.replace(/\s/g, '%');

var results = DataExtension.Retrieve({
    LeftOperand: {
        Property: 'Name',
        SimpleOperator: 'like',
        Value: query
    },
    LogicalOperator: 'OR',
    RightOperand: {
        Property: 'CustomerKey',
        SimpleOperator: 'equals',
        Value: query
    }
});

if (!results.length) {
    output = 'No results found for: ' + q;
} else if (results.length == 1) {
    url = getDataExtensionUrl(results[0], 'url');
    Platform.Response.Redirect(url);
} else {
    for (var i in results) {
        output += getDataExtensionUrl(results[i], 'a');
    }
}

function getDataExtensionUrl(result, type) {
    var objectId = result.ObjectID;
    var url = 'https://mc.s' + stack + '.marketingcloudapps.com/' +
        'contactsmeta/admin.html#admin/data-extension/' + objectId;
    if (type == 'url') return url;
    var name = result.Name;
    return '<p><a href="' + url + '">' + name + '</a></p>';
}

</script>
Finally we need some basic HTML to display the results stored in output and the search parameter with the convenient <ctrl:var name=JSVar /> syntax.
- Section
- Full code
<!DOCTYPE html>
<html>
<head>
<meta http-equiv="Content-Type" content="text/html; charset=UTF-8" />
<style>
   body {
       color: #000;
       font-family: Arial;
       font-size: 16px;
       margin: 0 auto;
       width: 80%;
   }
</style>
</head>
<body>
   <h1><ctrl:var name=q /></h1>
   <ctrl:var name=output />
</body>
</html>
<script runat="server">
Platform.Load('Core', '1');

/* --- SETTINGS --- */
var stack = 50;

var output = '';
var url = '';

var q = Platform.Request.GetQueryStringParameter('q') || '';
var query = q.replace(/\s/g, '%');

var results = DataExtension.Retrieve({
    LeftOperand: {
        Property: 'Name',
        SimpleOperator: 'like',
        Value: query
    },
    LogicalOperator: 'OR',
    RightOperand: {
        Property: 'CustomerKey',
        SimpleOperator: 'equals',
        Value: query
    }
});

if (!results.length) {
    output = 'No results found for: ' + q;
} else if (results.length == 1) {
    url = getDataExtensionUrl(results[0], 'url');
    Platform.Response.Redirect(url);
} else {
    for (var i in results) {
        output += getDataExtensionUrl(results[i], 'a');
    }
}

function getDataExtensionUrl(result, type) {
    var objectId = result.ObjectID;
    var url = 'https://mc.s' + stack + '.marketingcloudapps.com/' +
        'contactsmeta/admin.html#admin/data-extension/' + objectId;
    if (type == 'url') return url;
    var name = result.Name;
    return '<p><a href="' + url + '">' + name + '</a></p>';
}

</script>

<!DOCTYPE html>
<html>
<head>
<meta http-equiv="Content-Type" content="text/html; charset=UTF-8" />
<style>
    body {
        color: #000;
        font-family: Arial;
        font-size: 16px;
        margin: 0 auto;
        width: 80%;
    }
</style>
</head>
<body>
    <h1><ctrl:var name=q /></h1>
    <ctrl:var name=output />
</body>
</html>
You can now save, publish and open the Cloud Page. Go ahead and add ?q=test to the URL. If you have at least one Data Extension with a test as a part of the name or external key value you should be redirected to it or see the search results if there’s actually more than one. If not, try ?q=IGO as there should be default system Data Extensions.
Grab the URL because we will need it in the next step!
Search Engine
With the Cloud Page ready, let’s add an extra ingredient to the concoction. Setting up a custom search engine depends on the browser that you use, but should be more or less similar – just provide the name, shortcut to activate it and URL with replacement string and it's ready.
Below you can find a link to the instructions for Chrome, Firefox and Opera.
- Chrome
- Firefox
- Opera
note
Follow this instructions on support.google.com.
note
Follow this instructions on support.mozilla.org.
note
Follow this instructions on help.opera.com.
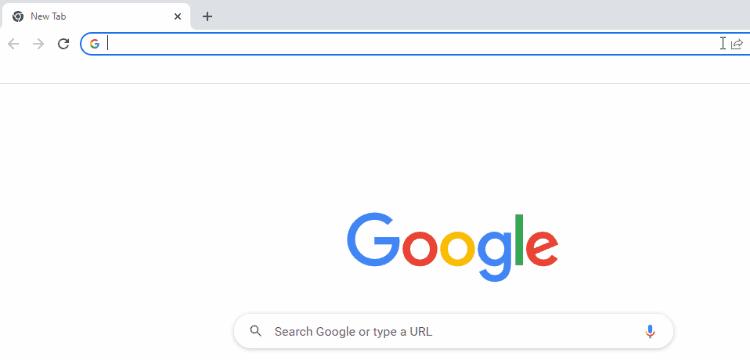
As a I'm personally using Chrome, mine looks like this:

Shortcut I use – de – is really convenient because I can press keys d e and then Tab or Space to enter the search mode. Keys are close to each so it's really seamless and easy.
Security Token
I’ve promised that we would do basic security with a token stored in a cookie in a browser. It is based on the Platform.Request.GetCookieValue() function that retrieves information from specified cookies and cookie declaring syntax.
To explore how this concept works, create the new JSON Code Resource, paste the below code, publish and open the page.
<script runat="server">
Platform.Load('Core', '1');

var cookie = Platform.Request.GetCookieValue('token');

if (cookie == 'foobar') {
    Write('Hello World');
}

</script>
You should see a blank page. Now open the Developer's Console (press F12 on Windows or ⌘+⌥+I on Mac) and paste the following line:
document.cookie = 'token=foobar';
When you refresh the page you should see a Hello world message.
So what exactly happened?
In SSJS we grab the value of the cookie named token and then with the if statement we display the message Hello world only if the cookie's value equals to foobar. So when you first opened the page it was blank as there wasn't a cookie that would fulfil the criteria. To be honest, there weren't any cookies at all!
Then with the document.cookie = we added the cookie named token and the value foobar. You can go to the Application tab in the Developer’s Console to see that the cookie named token indeed is there. Please refer to the mdn web docs if you would like to learn more about cookies.
To implement it in our solution we need to enclose the whole code that we wrote so far in the similar if statement.
- Section
- Full code
<script runat="server">
Platform.Load('Core', '1');

var cookie = Platform.Request.GetCookieValue('token');

if (cookie == 'thisShouldBeYourLongRandomString') {

/* SSJS goes here */

</script>

    <!DOCTYPE html>
    <html>

    /* HTML goes here */

    </html>

/* Reopen script tag
before closing curly
bracket of the if */

<script runat="server">
}

</script>
<script runat="server">
Platform.Load('Core', '1');

var cookie = Platform.Request.GetCookieValue('token');

if (cookie == 'thisShouldBeYourLongRandomString') {

    /* --- SETTINGS --- */
    var stack = 50;

    var output = '';
    var url = '';

    var q = Platform.Request.GetQueryStringParameter('q') || '';
    var query = q.replace(/\s/g, '%');

    var results = DataExtension.Retrieve({
        LeftOperand: {
            Property: 'Name',
            SimpleOperator: 'like',
            Value: query
        },
        LogicalOperator: 'OR',
        RightOperand: {
            Property: 'CustomerKey',
            SimpleOperator: 'equals',
            Value: query
        }
    });

    if (!results.length) {
        output = 'No results found for: ' + q;
    } else if (results.length == 1) {
        url = getDataExtensionUrl(results[0], 'url');
        Platform.Response.Redirect(url);
    } else {
        for (var i in results) {
            output += getDataExtensionUrl(results[i], 'a');
        }
    }

    function getDataExtensionUrl(result, type) {
        var objectId = result.ObjectID;
        var url = 'https://mc.s' + stack + '.marketingcloudapps.com/' +
            'contactsmeta/admin.html#admin/data-extension/' + objectId;
        if (type == 'url') return url;
        var name = result.Name;
        return '<p><a href="' + url + '">' + name + '</a></p>';
    }

</script>

    <!DOCTYPE html>
    <html>
    <head>
    <meta http-equiv="Content-Type" content="text/html; charset=UTF-8" />
    <style>
        body {
            color: #000;
            font-family: Arial;
            font-size: 16px;
            margin: 0 auto;
            width: 80%;
        }
    </style>
    </head>
    <body>
        <h1><ctrl:var name=q /></h1>
        <ctrl:var name=output />
    </body>
    </html>

<script runat="server">
}

</script>
In the production environment obviously you would use a more complex cookie value, like the one generated by this random string generator.
In this case we store the value as a plain text. As per best practice you should never store security related values as plain text, but rather use AMPScript functions like EncryptSymmetric() to store encrypted string and DecryptSymmetric() to decode it when needed. But as security is always a compromise between usability, convenience, the acceptable cost of being safe and the real risk of security breach, keeping it this way will do.
We can however add safety measures to our cookie declaration. One is max-age attribute that will make the cookie valid for defined number of seconds (so the value of 3600 will expire cookie after an hour), SameSite which won't send the cookie outside of our page and the Secure parameter which ensures cookie is sent only over secure, encrypted HTTPS and prevents man in the middle attacks (eavesdropping).
Whole cookie–setting clause would be:
document.cookie = 'token=thisShouldBeYourLongRandomString; max-age = 3600; SameSite = Strict; Secure'
One additional cool thing is that you can turn it into a so–called bookmarklet – a piece of JavaScript that you can add as a bookmark in your browser, so setting the cookie would require just one click - and it would even refresh the page to immediately display the results! Just add below code as a URL of your bookmark and use it when there is a blank page displayed instead of the results.
javascript:(function()%7Bdocument.cookie%20%3D%20'token%3DthisShouldBeYourLongRandomString%3B%20max-age%20%3D%203600%3B%20SameSite%20%3D%20Strict%3B%20Secure'%3Blocation.reload()%7D)()
REMEMBER
When adding this bookmark, double–check that:
- The URL starts with
javascript:as some browsers remove this part when copy–pasting to prevent malicious, unknown code execution. - You replaced the
tokenvalue (between%3Dand%3B) with the one that you used in your code.
You might not believe it but that's all – you've just built your own Data Extension Search Engine!
Let's celebrate with some tests. Activate the search engine in the address bar and try different phrases. Remember, when you see an empty page click on a bookmark that will set the cookie and reload the page.
Next Steps
Hungry for more? In the near future, I will write about adding support for multiple Business Units, more complex naming conventions and quick navigation with keyboard shortcuts. Stay tuned and don't forget about Alternative Approaches discussed below.
Full Code
<script runat="server">
Platform.Load('Core', '1');

var cookie = Platform.Request.GetCookieValue('token');

if (cookie == 'thisShouldBeYourLongRandomString') {

    /* --- SETTINGS --- */
    var stack = 50;

    var output = '';
    var url = '';

    var q = Platform.Request.GetQueryStringParameter('q') || '';
    var query = q.replace(/\s/g, '%');

    var results = DataExtension.Retrieve({
        LeftOperand: {
            Property: 'Name',
            SimpleOperator: 'like',
            Value: query
        },
        LogicalOperator: 'OR',
        RightOperand: {
            Property: 'CustomerKey',
            SimpleOperator: 'equals',
            Value: query
        }
    });

    if (!results.length) {
        output = 'No results found for: ' + q;
    } else if (results.length == 1) {
        url = getDataExtensionUrl(results[0], 'url');
        Platform.Response.Redirect(url);
    } else {
        for (var i in results) {
            output += getDataExtensionUrl(results[i], 'a');
        }
    }

    function getDataExtensionUrl(result, type) {
        var objectId = result.ObjectID;
        var url = 'https://mc.s' + stack + '.marketingcloudapps.com/' +
            'contactsmeta/admin.html#admin/data-extension/' + objectId;
        if (type == 'url') return url;
        var name = result.Name;
        return '<p><a href="' + url + '">' + name + '</a></p>';
    }

</script>

    <!DOCTYPE html>
    <html>
    <head>
    <meta http-equiv="Content-Type" content="text/html; charset=UTF-8" />
    <style>
        body {
            color: #000;
            font-family: Arial;
            font-size: 16px;
            margin: 0 auto;
            width: 80%;
        }
    </style>
    </head>
    <body>
        <h1><ctrl:var name=q /></h1>
        <ctrl:var name=output />
    </body>
    </html>

<script runat="server">
}

</script>
Alternative Approaches
As promised, here's the GitHub repo with the implementation of all 3 variants described in the Setup Considerations. Let’s discuss them briefly.
Single JSON Code Resource
First of all, create the Code Resource with the JSON type. As JSON Code Resources won’t render any HTML we can get rid of the whole HTML part. We also need to remove the anchor tags from the URL getter.
For better presentation we print the URL and the name separated by tab. Again, there's no HTML so we need a \t for the tabulator as well as a \n for newline to separate the results. We don't need any output variable because we can simply Write() to the page.
- Section
- Full code
if (!results.length) {
    Write('No results found for: ' + q);
} else if (results.length == 1) {
    url = getDataExtensionUrl(results[0], 'url');
    Platform.Response.Redirect(url);
} else {
    for (de in results) {
        Write(getDataExtensionUrl(results[de]));
    }
}

function getDataExtensionUrl(result, type) {
    var objectId = result.ObjectID;
    var url = 'https://mc.s' + stack + '.marketingcloudapps.com/' +
        'contactsmeta/admin.html#admin/data-extension/' + objectId;
    if (type == 'url') return url;
    var name = result.Name;
    return url + '\t' + name + '\n';
}
<script runat="server">
Platform.Load('Core', '1');

var token = Platform.Request.GetCookieValue('token');

if (token == 'thisShouldBeYourLongRandomString') {

    /* --- SETTINGS --- */
    var stack = 50;

    var url = '';

    var q = Platform.Request.GetQueryStringParameter('q') || '';
    var query = q.replace(/\s/g, '%');

    var results = DataExtension.Retrieve({
        LeftOperand: {
            Property: 'Name',
            SimpleOperator: 'like',
            Value: query
        },
        LogicalOperator: 'OR',
        RightOperand: {
            Property: 'CustomerKey',
            SimpleOperator: 'equals',
            Value: query
        }
    });

    if (!results.length) {
        Write('No results found for: ' + q);
    } else if (results.length == 1) {
        url = getDataExtensionUrl(results[0], 'url');
        Platform.Response.Redirect(url);
    } else {
        for (de in results) {
            Write(getDataExtensionUrl(results[de]));
        }
    }

    function getDataExtensionUrl(result, type) {
        var objectId = result.ObjectID;
        var url = 'https://mc.s' + stack + '.marketingcloudapps.com/' +
            'contactsmeta/admin.html#admin/data-extension/' + objectId;
        if (type == 'url') return url;
        var name = result.Name;
        return url + '\t' + name + '\n';
    }
}

</script>
JSON Code Resource w/ Landing Page
For this one we need to create one Landing Page and one JSON Code Resource. While the code on the Landing Page would be almost the same, we need to implement some changes in JSON Code Resource. As in the previous case, we can remove the whole HTML part. In the last else condition – multiple results – we need to redirect to the page capable of rendering clickable links.
Add a variable for storing the multiple results Landing Page URL that you created for this purpose. We need to combine the URL with the q parameter and then do the redirect.
To keep the code clean we can also remove unnecessary sections from both pages and simplify the getDataExtensionUrl() function.
- Changes
- Full JSON Code Resource
- Full Landing Page
/*--- SETTINGS ---*/
var stack = 50;
var multipleResultsUrl= 'https://sfmr-dev.pub.sfmc-content.com/results';

if (!results.length) {
    Write('No results found for: ' + q);
} else if (results.length == 1) {
    url = getDataExtensionUrl(results[0]);
} else {
    url = multipleResultsUrl + '?q=' + q;
}

if (url) Platform.Response.Redirect(url);

function getDataExtensionUrl(result) {
    var objectId = result.ObjectID;
    var url = 'https://mc.s' + stack + '.marketingcloudapps.com/' +
        'contactsmeta/admin.html#admin/data-extension/' + objectId;
    return url;
}
<script runat="server">
Platform.Load('Core', '1');

var token = Platform.Request.GetCookieValue('token');

if (token == 'thisShouldBeYourLongRandomString') {

    /* --- SETTINGS --- */
    var stack = 50;
    var multipleResultsUrl= 'https://sfmr-dev.pub.sfmc-content.com/results';

    var url = '';

    var q = Platform.Request.GetQueryStringParameter('q') || '';
    var query = q.replace(/\s/g, '%');

    var results = DataExtension.Retrieve({
        LeftOperand: {
            Property: 'Name',
            SimpleOperator: 'like',
            Value: query
        },
        LogicalOperator: 'OR',
        RightOperand: {
            Property: 'CustomerKey',
            SimpleOperator: 'equals',
            Value: query
        }
    });

    if (!results.length) {
        Write('No results found for: ' + q);
    } else if (results.length == 1) {
        url = getDataExtensionUrl(results[0]);
    } else {
        url = multipleResultsUrl + '?q=' + q;
    }

    if (url) Platform.Response.Redirect(url);

    function getDataExtensionUrl(result) {
        var objectId = result.ObjectID;
        var url = 'https://mc.s' + stack + '.marketingcloudapps.com/' +
            'contactsmeta/admin.html#admin/data-extension/' + objectId;
        return url;
    }
}

</script>
<script runat="server">
Platform.Load('Core', '1');

var token = Platform.Request.GetCookieValue('token');

if (token == 'thisShouldBeYourLongRandomString') {

    /* --- SETTINGS --- */
    var stack = 50;

    var output = '';

    var q = Platform.Request.GetQueryStringParameter('q') || '';
    var query = q.replace(/\s/g, '%');

    var results = DataExtension.Retrieve({
        LeftOperand: {
            Property: 'Name',
            SimpleOperator: 'like',
            Value: query
        },
        LogicalOperator: 'OR',
        RightOperand: {
            Property: 'CustomerKey',
            SimpleOperator: 'equals',
            Value: query
        }
    });

    for (var i in results) {
        output += getDataExtensionUrl(results[i]);
    }

    function getDataExtensionUrl(result) {
        var objectId = result.ObjectID;
        var name = result.Name;
        var url = 'https://mc.s' + stack + '.marketingcloudapps.com/' +
            'contactsmeta/admin.html#admin/data-extension/' + objectId;
        return '<p><a href="' + url + '">' + name + '</a></p>';
    }

</script>

    <!DOCTYPE html>
    <html>
    <head>
    <meta http-equiv="Content-Type" content="text/html; charset=UTF-8" />
    <style>
        body {
            color: #000;
            font-family: Arial;
            font-size: 16px;
            margin: 0 auto;
            width: 80%;
        }
    </style>
    </head>
    <body>
        <h1><ctrl:var name=q /></h1>
        <ctrl:var name=output />
    </body>
    </html>

<script runat="server">
}

</script>